How to take body measurements correctly and how to determine the results of training
When you are seriously passionate about something, you probably do it with all your heart, while not forgetting to monitor your results.
After all, this equally applies to sports. If you are determined to achieve any results, you monitor the progress of each workout and the changes that occur in your body. This article will help you on how to take body measurements correctly. But there are a lot of ways to determine the results of training, so in order not to bother you, I will tell you about the most basic of them. To begin with, we will determine the effectiveness of training for the purpose of losing weight and gaining muscle mass, there are three of them: weighing, body measurements and measuring subcutaneous fat. These three methods complement each other and together give a complete picture of what is happening.
The first method is weighing.
The simplest and most regular thing that all people involved in sports do is weigh themselves.
. It is necessary to monitor your weight, but you cannot rely on this indicator alone. Since when losing weight, a situation may arise that you, on the contrary, will gain a little weight, but this weight will not be gained by adding fat, but by increasing muscle mass. However, as is correct, this is a very low probability, since when you dry out (lose weight), your caloric intake decreases, and for muscle growth, on the contrary, you need to increase caloric intake (excess). Although this also happens - weight increases (body weight and volume), but not due to the increase in muscle tissue, but due to the appearance of excess subcutaneous fat or vice versa...
Basic rules for weighing:
- You need to weigh yourself every week, at the same time and on the same day of the week.
- You need to weigh yourself after using the toilet and before breakfast.
But in order for the picture to be more complete, in addition to weighing, you should take measurements of body volumes and measurements of fat folds using a caliper, because only then will you track your achievements and body changes over time (as correctly as possible). You can learn more about measuring subcutaneous fat in the article: How to measure subcutaneous fat.
The second method is body measurements
It is more accurate than the first, but as already said, they need to be combined.
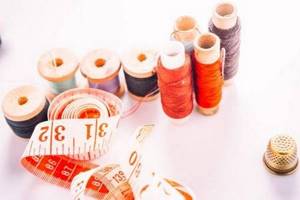
Body measurements (body measurements) can be made with a regular centimeter tape, or with paper or thread, and then take readings with a ruler. The first method is more convenient, but if you don’t have a measuring tape at hand, then the second method is also perfect. So, how should you measure correctly and in what places? Let's talk about all this in order.
Body measurements for weight loss and weight gain
Wrist
– the measurement takes place with a relaxed hand, in the thinnest place (above the protruding bone).
Forearm
(part of the arm from the elbow to the wrist). It is measured in two states - relaxed and tense. In the first, the arm hangs calmly along the body, in the second, the arm is bent at an angle of 90 degrees, the muscles are tense. In both cases, the thickest part is measured.
Shoulder
(this is the part of the arm from the elbow to the shoulder, not from the shoulder to the neck). It is measured in a calm state - the arm hangs along the body, relaxed. Freezing in a tense state - the hand is raised and clenched into a fist at head level.
Neck
. It is measured in a calm state - the chin is slightly raised, the measuring tape lies horizontally, and not obliquely. Do not try to pull your neck into your body or stretch it, or even press your chin to your chest - this will not improve your training results, but on the contrary, you will deceive yourself.
Rib cage -
measured at the widest point for men and at the most protruding points for women. In a calm state, the measurement is taken after a calm, normal inhalation (do not inhale too deeply or stick out your chest). In a tense state, you need to tense the muscles of your back and chest and slightly spread your elbows to the sides. There is another option for measuring the chest. You measure it at maximum inhalation, then also at maximum exhalation. Add up the resulting readings, then divide by two, the resulting number is the average volume of your chest.
Waist -
measured at the thinnest point, if you have one. And if there is a protruding belly, then the measurement is made, on the contrary, along the widest part. Again, do not try to deceive the readings, so do not pull in your stomach, and do not pull the measuring tape too tightly, but it should not sag either - just adjust it to the measuring site. If you want to measure your waist in a tense state, then tense your abdominal muscles and measure.
Buttocks -
are measured, as a rule, in a relaxed state, at the most prominent points. That is why at the very beginning of the article it is said that it is better to take measurements with an assistant; it can be difficult not only to find the most protruding points at the back, but also to measure correctly.
Hip
– the widest part is measured in a relaxed state, either standing quietly or placing a bent leg on a chair. In a tense state - standing, leg straightened, muscles tense.
Shin
– measured at the widest point. Relaxed state - the leg is placed on a chair, tense state - raised on your toes, transfer your body weight to the leg that you are measuring.
Female figure measurements.
Basic measurements for shoulder products
SS – neck semicircle – measurements are taken at the base of the neck. The centimeter tape at the back passes its lower edge above the cervical point (7th cervical vertebra); on the side – at the base of the neck; in front it closes above the jugular notch. Recorded at half size.
From the side and front, the tape should pass along the base of the neck, closing above the jugular cavity. When taking this measurement, you should pay attention to the shape and position of the neck. The length of the neck is taken into account when choosing a product model; shape and fat deposits are taken into account in the design when determining the width and depth of the neck. The position of the neck influences the design of the neckline in products.
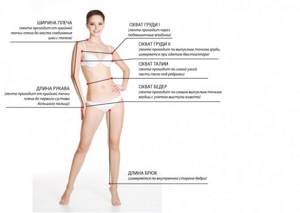
SG1 - chest semicircle first - measure the full circumference of the chest. The measuring tape should pass horizontally around the body at the level of the armpits through the protruding points of the mammary glands and close in front on the right side of the chest. Recorded at half size.
SG2 - the second semicircle of the chest (above the chest) - measured around the torso. From the back, the measuring tape is placed horizontally along the lower corners of the shoulder blades, touching the rear corners of the armpits with its upper edge, then along the armpits. At the front, the tape should pass over the base of the mammary glands and close on the right side of the chest. Recorded at half size.
URV - tuck solution level - is taken simultaneously with the SG2 measurement. Measurements are taken from the highest right point of the mammary gland to the measuring tape above the chest (or to the line of the base of the mammary glands at the top). Fully recorded.
CT - waist semicircumference - measurement is taken at the narrowest point of the torso. The measuring tape should run horizontally. Recorded at half size.
SB - semicircle of the hips - the measurement is carried out strictly horizontally around the hips along the most protruding parts of the buttocks, closing the measuring tape on the right side of the body. Recorded at half size.
If the SB measurement needs to be made taking into account the protrusion of the abdomen, then the position of the measuring tape is the same as stated above, only in front it should pass along a flexible plate (ruler) applied vertically to the stomach to take into account the protrusion of the abdomen.
Some women have two hip girths - upper and lower, and the lower girth is larger than the upper and is not recorded by the usual measurement. To reveal the lower increased girth, the measuring tape is clamped at the level of the upper measurement and the measuring tape is lowered in a circular motion. If it does not go down, the tape is lowered by the required amount and thus the second lower girth is fixed. Write down these measurements side by side and measure the length to the lower girth. When constructing a drawing, these features are taken into account.
LH - chest line - is measured from the intended point of the base of the neck through the convexity of the shoulder blades to the chest line marked on the back (to the centimeter tape when measuring SG1). The measuring tape should run parallel to the spine.
DTS - back waist length - is taken simultaneously with the LG measurement along the back from the intended point of the base of the neck through the convexity of the shoulder blades to the braid encircling the waist (the most protruding part of the shoulder blade is used). The measuring tape should run parallel to the spine. If the person being measured has different shoulder blade heights, then the measurement is taken on the higher side of the back.
Diz - the length of the product - is measured simultaneously with the LH and DTS measurements from the intended point of the base of the neck along the back through the convexity of the shoulder blades, without tearing off the measuring tape to the desired length. The measuring tape lies strictly vertically. Hold the tape at the waist with your left hand, and determine the length of the product with your right hand.
LL - line of the shoulder blades - is measured from the point of the base of the neck to the level of the most convex part of the shoulder blades (oriented by the level between the rear corners of the armpits, that is, the height where we will measure the width of the back). Make sure that the measuring tape runs parallel to the spine.
SHS - back width - this measurement is taken from the articulation of one arm with the torso to the articulation of the other arm with the torso through the convexity of the shoulder blades. The measuring tape should lie horizontally. Write down this measurement in half size.
When taking measurements, the widest part of the back is taken. At the same time, pay attention to the location of the protrusion of the shoulder blades and the curvature of the back, which is taken into account when constructing the midline of the back and darts for the shoulder blades. This measurement must be particularly accurate. Do not tuck measuring tape under your armpits.
LES - shoulder-back slope - is measured from the intended shoulder point (the final, lowest point of the shoulder) through the convexity of the shoulder blades to the center of the back at the waist (or to the point of intersection of the spine with the waist line). If the person being measured has different shoulder heights, then the measurement is made on the higher shoulder or the height of both shoulders is measured. The difference in measurements of the right and left sides is eliminated during the manufacture of the product.
ШПр – armhole width – measurement is carried out using a ruler at the level of the back corners of the armpits with the arm freely lowered. That is, this is the distance between the verticals, mentally drawn down from the front and back corners of the armpits.
DB - side length - measurement is taken from the back from the waist line in a straight line to the upper edge of the ruler applied to the back corner of the armpit. Subtract 1.5-2-3 cm from the resulting value (depending on the circumference of the arm).
VH - chest height - is taken from the intended point of the base of the neck to the center of the chest. Fully recorded.
When taking this measurement, pay attention to the shape of the underwear and determine the correct position of the center of the chest so that the position of the dart in the product does not have to be changed. For a figure with a high chest, the center is lowered by 0.5-1 cm. This is especially important in products made of rigid fabric.
DTP - front waist length - is taken simultaneously with the VG measurement from the intended point of the base of the neck through the center of the chest to the horizontal (elastic band) at the waist. Fully recorded.
FLP - front shoulder slope - is measured from the intended shoulder point (the middle of the shoulder joint) to the highest point of the chest gland. Fully recorded.
If the person being measured has different shoulder heights, then the measurement is carried out on the higher shoulder or on the right and left sides separately.
OR - arm circumference - measurement is carried out with the arm strictly lowered around the arm perpendicular to the axis of the shoulder so that the upper edge touches the posterior corner of the armpit. The tape should close on the outer surface of the hand. Fully recorded.
The measurement is necessary to determine the width of the armhole and the width of the sleeve at the top. With a very full arm, it is necessary to take this circumstance into account when constructing the sleeve and distributing the fit along the edge.
ШГ1 – front (chest) width first – measurement is taken through the protruding points of the mammary glands in the horizontal plane between imaginary verticals drawn down from the front corners of the armpits (approximately at a distance of 1.2-1.5 cm from the hand). Recorded at half size.
ШГ2 – width of the front (chest) second – measurement is carried out in the horizontal plane above the bases of the mammary glands between the front corners of the armpits. Recorded at half size.
RC - the distance between the centers of the mammary glands - is measured between the most prominent points of the mammary glands. The measuring tape should lie horizontally. Recorded at half size.
Lpl - shoulder length - measurement is taken from the base of the neck in the middle of the shoulder to the shoulder point. Fully recorded.
DR - sleeve length - measurement is taken from the shoulder point with the arm freely lowered (it is slightly bent) to the desired length, depending on the type of product.
DL - length to the elbow - is taken simultaneously with measuring the length of the sleeve to the elbow bone.
OK - hand circumference - measured at the widest point of the hand with slightly extended fingers. Fully recorded.
WC - wrist circumference - measurement is made perpendicular to the axis of the forearm along the wrist joint through the head of the radial bone. The measuring tape should close on the outer surface of the arm.
Basic measurements for trousers
LSB - side length - is measured along the side of the thigh through the most protruding area of the thigh from the elastic at the waist and then vertically to the floor.
DSP - front length - is measured from the elastic at the waist through the most protruding point of the abdomen and then vertically to the floor.
LtK - length of the waist of the knee - is measured simultaneously with the measurement of DsB from the elastic band at the waist along the side of the leg to the middle of the knee.
DS1 – first step length – is measured in the position “riding on a ruler” from the top edge of the ruler to the floor along the inside of the leg.
DS2 - step length two - measured from behind from under the gluteal fold to the floor.
Note. If the measurements DS1 and DS2 are taken correctly, then DS1 > DS2 by 1-1.5-2-2.5-3-4cm, where 2-2.5cm for a conditionally proportional figure.
BC - seat height - is measured while sitting on a chair-table. A measuring tape runs from the elastic along the side to the horizontal of the chair.
OB (lunch) - thigh circumference - measure the widest part of the leg at the top of the leg, touching the upper edge of the measuring tape under the gluteal fold.
OH - leg circumference - measured above the knee by 10-15cm. Centimeter tape horizontally.
OK - knee circumference - measured around the knee with the leg bent at an angle of 900. The measuring tape runs along the popliteal fossa, closing at the front in the middle of the knee. For tight-fitting trousers, the measurement is taken with the leg straightened.
LPR - armhole length - control measurement, measured from the elastic at the front waistline through the groin to the elastic at the back waistline. The length of the armhole is equal to the length of the bow line plus the length of the seat line.
SHN - the width of the bottom of the trousers - is chosen at will and it depends on the fashion, style, fabric.
The third method is measuring subcutaneous fat
In addition to all the above measurements, it is necessary to periodically and regularly measure the fat layer (subcutaneous). Because volumes can increase due to subcutaneous fat, and you will think that it is your muscles growing.
There are a huge variety of methods for determining subcutaneous fat. Therefore, to learn in detail about each of them and choose the most suitable one for yourself, read the article: How to measure subcutaneous fat. Although I recommend a better method - Kalipometry,
since it is one of the accurate and simple ones.
Also, a recording of measurements missed due to lack of time or plain laziness can greatly spoil the picture of intensive training. Can you remember exactly all the numbers you received, say, a couple of weeks ago? It’s unlikely... But without this, it will be unclear how far you have progressed in losing weight or building muscle.
How to measure your parameters correctly
Every woman, to a greater or lesser extent, has an idea of how measurements are taken. If only because I’ve probably used the services of a professional milliner more than once. But what should you do if you need to do this yourself and how to correctly measure your parameters? For example, in order to order clothes from an online store, you will have to clearly determine the size based on these indicators. Brief and accessible information will help you carry out all manipulations quickly, competently and without errors!
Other ways to determine training effectiveness
- For those involved in strength training, results can also be recorded based on the number of approaches, repetitions and weights lifted. But all this data must be recorded in a training diary, otherwise you will not be able to monitor your progress.
- For those who develop endurance, it would be useful to record the time spent covering distances, the number of contractions of the heart muscle and the distance covered. All this data also needs to be recorded in your training diary in order to clearly see your achievements.
- And the last method for today is a photo diary,
in principle, it is a good alternative to body measurements. Every month you take three photographs (primary) of your body, without clothes - front, back and side. But you need to constantly take photographs from the same distance and angle, otherwise the training results will not be accurate. As a result, by comparing photographs over several months, you will be able to see the difference not only in numbers, but also externally from the photographs. In this method, you can choose which part of the body to photograph, this will not interfere in any way, but on the contrary...
Some tips
- Don’t be too scared or worried if the weight suddenly “goes up” or the muscles stop growing. In both cases, you need to reconsider your training program and diet. You will learn more about nutrition for weight loss and muscle growth in the section Proper nutrition.
- There can also be many reasons why muscle mass stops growing. Some of the main ones are: lack of nutrients (energy), lack of recovery, no progression of load, poor exercise technique and your energy system is not yet ready for further growth, so it needs to be further developed (train regularly and follow the training program). If you are all If you analyze this, you will find what your problem of stagnation (plateau) is.
- It is quite possible that the weight that quickly escaped decided to settle on your sides and waist again just because a series of holidays passed in your life, and your diet was slightly disrupted. Or maybe you were sick or worked very hard, so you had no time for training.
Adviсe
- If possible, remove your clothing first and wear only your underwear to take your measurements. The same goes for any other person you need to take measurements from.
- If you doubt the accuracy of a measurement, it is better to round it up rather than down. It is easier to sew loose clothes than to solve the problem in a situation where the clothes do not fit.
- If you decide to use a measuring tape to take measurements, then you need to purchase it at fabric and craft stores. A metal tape measure from a hardware store will not work for this purpose.
Summarize
So we looked at the topic: How to take body measurements correctly. And how to determine the results of training?
Based on this, it becomes clear that in any sport it is necessary to analyze and compare the results, but if this is not done, then you will simply “stand still” and not progress. For this very reason, all athletes attach great importance to monitoring their achievements. After all, if you scrupulously monitor any process, then in the end you will learn to manage it (results).
Exercise, eat right and get better - good luck to you.
Body proportionality
Based on the numbers, we can say that the attractiveness of a particular athlete depends on his proportions. Since numbers are directly related to mathematics, proportions are described by a clearly formulated formula. The name of this formula is the golden ratio. The resulting number describes the human body as a whole and helps determine the proportions that can be considered the most correct by nature. The most striking example of a description of ideal proportions is the man of Leonardo da Vinci, who is depicted in a square and a circle. Thanks to this illustration, one can reveal the triumph of regular geometric shapes in human proportions. The so-called “golden ratio” determines the ratio 1:1.618. Thus, if we take the thigh as a unit, then the entire leg (thigh + lower leg) should be equal to 1.618 times the size of the thigh.
Since man is a rational being, the desire for harmony and symmetry is constant. That is why the beauty of the body is assessed based on the parameters prescribed by the golden ratio. If we talk about bodybuilding or fitness, then first of all, it is worth understanding that comprehensive muscle development comes first. The waist-to-shoulder ratio is especially pronounced. If you change this attitude, the development of body harmony will significantly advance in a positive direction.
Note
Depending on the body type, the plan for working on the muscles also changes. So it’s more logical for an ectomorph to start with pumping up the shoulders. An endomorph needs to reduce his waist size.
Having set the task of achieving ideal parameters, you first need to find out your personal parameters in order to find out which muscles you should focus on. And only after this can you draw up a specific training plan, choosing a particularly suitable program. All athletes who train in the gym differ from each other not only in their structure, but also in their physical fitness.
There are clearly defined proportions that will be as close as possible to harmonious:
- the volume of the pelvis should be nine tenths of the volume of the chest (that is, if the pelvis is 90 cm, then the chest should be 100 cm);
- - neck circumference should be 38% of chest circumference;
- - forearm circumference 30% of chest circumference;
- - waist 75% of chest circumference;
- - hips 60% of the pelvic volume;
- — the lower leg should ideally have a circumference equal to the circumference of the biceps in tension, or 40% of the pelvic circumference.
If we take into account ideal proportions, then the volumes of the neck, biceps and calves should be the same. If this is so, then we can say that the athlete is very well built athletically and his muscles are harmoniously developed.
You can also find out your ideal proportions based on weight and height from the following table (see table).
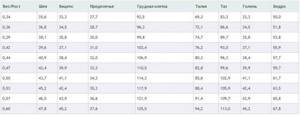
The “Weight/Height” ratio is the ratio of your weight (in kilograms) to your height (in centimeters). For example, your weight is 70 kg, and your height is 180 cm, which means that the value closest to your coefficient (0.388) is 0.39, therefore, we look at the proportions corresponding to it.
Thus, it became clear that knowing the ideal proportions is important, regardless of whether you plan to participate in competitions or train exclusively for yourself. But first you need to sort out the measurements that will be required for subsequent calculations.
How to measure your body
Even if you use scales and don't have time to count your body fat, the least you need to do is buy a tape measure and measure your body periodically. This is very useful, even for calculating body fat percentage. Taking measurements is a fantastic way to track how your body shape changes as you become leaner. As you burn fat and increase muscle mass, it may happen that you weigh a little more, despite your body becoming thinner and more toned. So how do you measure your body?
To get a complete picture of your progress, when measuring your body, you should measure it in 10 different places. Otherwise, a quicker and easier option is to simply measure your chest, waist, and hips, including upper or lower body measurements depending on your problem areas (eg hips, arms).
Russian sizes of women's clothing
Basically, the Russian light industry uses patterns in its production according to certain standards. Almost every woman is familiar with this system of parameters. There is nothing complicated here.
It must be remembered that the size range that is used in Russia starts with the smallest value - 40 and ends with the largest size - 58. All other sizes in this interval are obtained by adding to the next one, the number of centimeters determined by the standards.
But that is not all. Each clothing size has its own specific parameters that manufacturers adhere to.
Determination of size range
Today, the standards by which clothes are sewn are no longer so demanding. More precisely, it all depends on the patterns according to which this or that clothing is made (they can be either European or Chinese). There is no exact Russian size range. But the peculiarities of determining the parameters of different types of clothing remain.
In order to correctly determine the size, you need to take certain measurements using a centimeter tape. They are made not for clothes, but for underwear. In this case, the measurements should not tighten parts of the body, but also not sag.
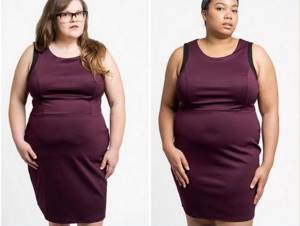
The size range is usually standard. But there are no ideal figures. All women are different. If the value indicator is between two indicators, then it is better to give preference to the larger one. In this case, you can take into account shrinkage during washing. In this volume it will be more comfortable for a non-standard figure to walk. It should also be remembered that clothes that tightly fit the figure (especially with obvious flaws) always make you look fatter.
Parameters according to basic standards are determined mainly by the girth of the chest, waist and hips.
Clothing according to Russian standards has a certain formula (known since Soviet times): we divide the circumference of the bust by two, and as a result we get the value. For example: bust or bust = 100 cm: 2 = size 50.
But everything has its own subtleties. You cannot determine the parameters of trousers based on bust size alone. In order to determine the size of different wardrobe items, take the sizes of different parts of the body:
- hip volume is measured for skirts and trousers;
- chest volume – dresses, coats, blouses;
- underwear - thighs;
- bust circumference and under bust volume for bra.
There is also a definition of growth indicators. Women with a height of up to 167 cm and from 170 cm, having the same volumes, cannot always purchase the same clothing sizes. Therefore, we will look at the parameters and how to remove them correctly.
Options
As mentioned above, it is necessary to determine the parameters using a measuring tape. If the figure is non-standard, then the help of another person will be required. Taking measurements yourself can distort the results.
OG (in other words, bust). Measurements are taken on the most protruding parts of the mammary glands. The centimeter should go under the armpits and not sag on the back.
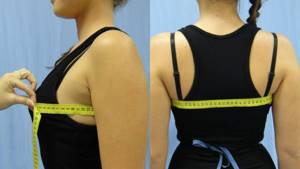
Volume under the bust. Measure under the mammary glands, at the widest point of the back (through the shoulder blades).
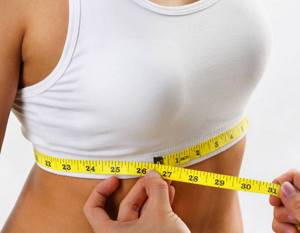
OT (waist circumference). To determine the location of the waist, and it is different for all women - there is a high, medium and low location - you need to put your hands on the waist (they will automatically determine it) and take a measurement in this place. There is an opinion that the waist is measured through the navel, but this does not take into account body type.
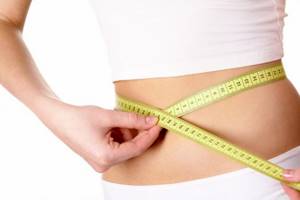
OB (hip circumference). Measure along the most convex and rounded parts of the buttocks. This is approximately 20-25 cm below waist level. But it all depends on the specific figure and height.
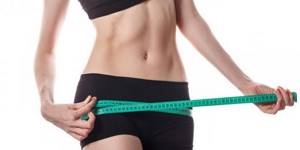
Side length of trousers. This is a relative value. The range of trousers is very large: high-rise, low-rise and classic trousers. Everything will depend on what kind of trousers you need to purchase. The measurement is taken from the top desired point along the outside of the thigh to the ankle.
Length of the inner seam of the trousers. Standard measurement for all types of trousers. It is done along the inner thigh from the groin to the desired length of the trousers.
The length of the sleeve. The sleeve comes in different styles - set-in and raglan. Therefore, the measurements will not be the same. From the top bone of the shoulder to the wrist through the elbow - for a set-in sleeve. Raglan is measured from the bottom of the neck to the wrist through the elbow. For a coat, the elbow is slightly bent.
ОШ (neck circumference). The measurement is taken at the base of the neck (through the 7th cervical vertebra). For high collars, measurements are also taken at the base of the head.
Height. Mandatory indicator for clothing parameters. It is necessary to stand upright near a flat vertical surface. In this case, the heels, shoulder blades and back of the head should touch the wall. The chin is pressed to the chest. And in this position, take a measurement parallel to the floor.
It should be remembered that the measuring tape should not be old (it tends to stretch) so as not to distort the results. All measurements are taken strictly perpendicular and parallel to the floor. The body should not be tense.
How to measure body volumes
- Bust : Measure all around the bust at the nipple line.
- Chest : Measure directly under your breasts, as high as possible.
- Waist : Measurement at the narrowest point of the width, usually just above the navel.
- Hips : Measure around the widest part of the hip bone.
- Belly : Measure your stomach between the widest part of your hips and waist.
- Thigh : Measure around the fullest part of your thigh while standing
- Knees : Measure just above the knee.
- Calves : Measure around the fullest part.
- Shoulders : Measure above your elbows - around the fullest part.
- Forearms : Measure below the elbow - around the fullest part.
Taking measurements
Due to the fact that the issue is quite important and has been discussed for a long time, certain rules have been formed, adhering to which the measurements will be as correct as possible, and, not least important, objective. First of all, you need to get a measuring tape. Taking measurements with a regular ruler and thread is not the best option - it is both inconvenient and impractical. It is best to take measurements in the morning, when the muscles are in a relaxed (“cold”) state.
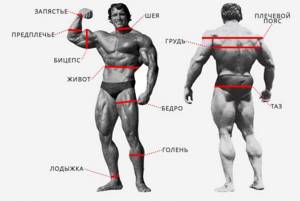
Wrist
Measurement location: in the thinnest part of the forearm, next to the hand.
Forearm
Position: bend your arm at the elbow, clench your hand into a fist, bend it towards the forearm (the angles between the hand and forearm, and between the forearm and shoulder are 90 degrees). Tighten your forearm muscles.
Measurement location: the widest part of the forearm, 1-2 cm away from the elbow.
Biceps
Position: bend your arm at the elbow (the angle between the forearm and shoulder is 60-80 degrees). Contract your biceps and triceps.
Measurement location: the widest part of the shoulder is approximately the middle of the biceps (the place of its peak).
Neck
Position: lift your chin, relax your neck muscles. Measurement location: just below the level of the Adam's apple.
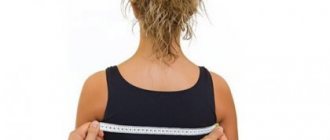
Shoulder girdle
Position: stand straight, straighten your shoulders and move them back a little, arms along your body. All muscles are in a relaxed state.
Measuring location: The measuring tape should pass through the top of the pectoral muscles and the middle of the deltoids.
Breast
Position: stand straight, breathe calmly, muscles relaxed.
Measurement location: the widest part of the chest (1-3 cm above nipple level)
Stomach
Position: stand straight, breathe calmly. We don’t strain our abdominal muscles, we don’t pull them in.
Measurement location: middle of the abdomen, slightly above the navel.
Pelvis
Position: Stand straight. The muscles are relaxed.
Measurement location: at the widest part of the pelvis (middle of the gluteal muscles).
Hip
Position: Stand straight. Shift your body weight to the leg being measured and tighten your thigh muscles.
Measurement location: the widest part of the thigh (at the very top of the leg).
Shin
Position: Measure while sitting. Tighten your calf muscles (put your foot on your toes and transfer your weight to the leg you are measuring).
Measurement location: the widest part of the shin.
Ankle
Position: Measure while sitting. The leg is relaxed.
Measurement location: just above the foot, in the thinnest part of the shin.
Men are advised to take measurements of all parts of the body. For girls, it will be enough to measure the chest, abdomen, pelvis, thigh and lower leg.
Our website was created to make the training process more convenient. Each user of our site has his own individual account where you can save your measurements! Become one of us
Why measure your body?
Take measurements every two weeks and write them down so you can track your progress. This is a great motivator! Of course, you may not like it at first, but once you start seeing results, you will get an incredible sense of achievement. Even if you have already started your program, it is still never too late to start measuring (body fat or body measurements) because it is amazing and rewarding to see how your body continues to change. If you want, enter your body measurements into a body fat calculator to estimate your body fat percentage.
Something interesting about body measurements
An interesting fact about body measurements is that studies have shown that a woman's attractiveness is influenced not so much by her weight as by her waist-to-hip ratio. It appears that women with a ratio of 0.7 (i.e., waist circumference 70% of hip circumference) are generally perceived as more attractive by men, regardless of culture or body type. Various beauties such as Sophia Loren, Marilyn Monroe, Beyonce Knowles, Kate Moss, Alessandra Amrosio and Salma Hayek have a waist-to-hip ratio of about 0.7.
how to measure your waist without a centimeter
Let's talk about a very important topic for us women. 

Dear Ladies, if you are interested in information of this type and if you liked this article, express your opinion in the comments (you can share your secrets or ask questions) and PUT A PLUS AT THE END OF THE POST! Your opinion is very important to us 

Its beauty and forms are sung by poets of all times and peoples. She inspired many great sculptors and artists, and continues to do so to this day.

If you ask the stronger half of our world what invariably attracts their attention and which part of the female body they want to touch the most, I am sure that more than half will answer - the female breast. She is a symbol of female sensuality, the dominant trump card in love games, and it is she who gives her owner seductive self-confidence. Following breast fashion is not easy. Only recently they preferred women with curvaceous figures, and now, here you are - flat-chested teenage women are already in great demand. But it's not even about fashion. she is small , medium or curvy, the main thing is that the breasts should be healthy and well-groomed. You need to groom and cherish your breasts every day. We have already told you that it needs to be nourished with cream in order to remain elastic and firm for a long time. Sports activities are no less useful. Of course, you will not increase the size of your mammary glands))) But pumped up pectoral muscles will help deceive others. It must be taken into account that as a result of age-related changes, women over the age of twenty lose an average of 500 g of muscle mass every year, and the amount of fat in the body increases by 1-2 kilograms. Simple advice: good posture visually makes the breasts appear more voluminous, while slouching visually makes them smaller. To expand your chest and relax your shoulder girdle muscles, also include exercises for the stabilizing muscles of the back in your training program and spend enough time on the deadlift machine, which improves your posture EXERCISES FOR BEAUTIFUL CHESTS Bench push-ups: stand with your back to the bench, rest your hands, Stretch your legs slightly forward. Bend your arms and “squat” as low as possible, keep your breathing even. Repeat squats 6-8 times. Dumbbell Combination Press: While lying on a bench, raise your arms straight above your chest. Bend your elbows, press them to your sides and immediately press the dumbbells up again. Then spread your arms slightly bent at the elbows wide and bring them back above your chest. This dumbbell press and fly combination counts as one repetition. Power press: feet hip-width apart, arms hanging down with weights. Raise both arms up at chest level, spread them to the sides, while rising onto your toes. Bring your arms together and lower your heels to the floor. "Skier" Exercise for chest growth: stand straight, use your hands with dumbbells to perform alternating movements back and forth with your elbows bent, as if you were pushing off with ski poles. The movements are slow, smooth, from the hip. Raise your arm at chest level, fix it for a few seconds, tensing your pectoral muscles, the other arm is pulled back and also tense. Relax and lower your arms. You can do the exercise in a similar way, only the arms do not move alternately, but both forward and backward at once. You need to repeat this 8-10 times until your muscles feel slightly tired.
Even if you are unhappy with the shape or size of your breasts, still accept and love yourself for who you are. Treat this miracle of nature with respect, because if she rewarded you with just such breasts, then it was necessary for someone. And in our huge world there will definitely be the most dear and beloved person who will appreciate your most beautiful part of the body. And perhaps he already appreciates it. Look at yourself in the mirror, look through the eyes of a man in love, and find gentle and kind words to describe her. Repeat them to yourself so that they, like a prayer, will forever sink into your soul. Confidence in your uniqueness is a great strength. A confident woman, no matter what her breast size, is assessed immediately. The main thing, I repeat, is not the size and shape of the breast, but its health, beauty and longevity. CHOOSE A BRA Choosing a bra should begin with determining your breast size. Today, throughout the world, the most common values are European, consisting of a letter and a number. So, the letter indicates the fullness of the cup, and the number indicates the circumference under the bust. In order to determine what size you need, you should first know your parameters. With the help of a friend (mother, sister) and a centimeter, you need to measure the chest under the chest and the chest itself. It is very important not to drag the centimeter, not to raise or lower it, but to guide it straight along your back. When measuring your chest, guide the measuring tape along the most protruding points - this way the result will be the most accurate. So, the breast size and volume under the bust are known. But how do you know how full your cup is? The formula is simple: chest girth minus underbust girth to get cup fullness.
This sign will help you correctly identify the correct cup size:
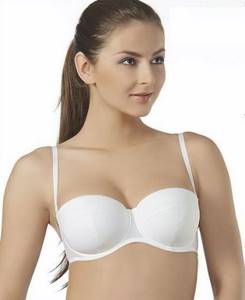
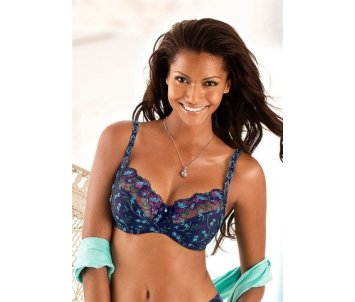
10 - 12 cm, cup AA (0) 12 - 13 cm, cup A (1) 13 - 15 cm, cup B (2) 15 - 17 cm, cup C (3) 18 - 20 cm, cup D (4) 20 - 22 cm, DD cup (5) 23 - 25 cm, E cup (6) 26 - 28 cm, F cup (6+) However, no matter how correct the measurements are, it is best to try on the underwear in person and test it. Namely, to see whether a particular model fits the shape of the breast, whether it holds well - whether the straps are falling off. Ideally, the bra should support the breasts well without pinching them . If, after jumping, running or other physical movements, you feel the desire to adjust your bra by pulling it down, it means that the underwear is chosen incorrectly. There are several types of bras. Each of which suits a specific breast size and shape. Let's look at the main options. Balconette. Available with soft and hard cups. The first type is suitable for women with medium and large breasts, the second - with small ones. The only thing is that if the bra is made of thin lace and has a clear nipple halo (this model is also called “Angelica”), then such fabric can irritate delicate skin. Therefore, it is better to save beautiful lingerie for special occasions.

Let no one see this, it’s enough that you are dragging yourself away!!! So no more “but no one will see”!!!
GIRLS, WE URGENTLY CHECK OUR BRAS FOR PROFESSIONAL COMPATIBILITY!
You can learn about other beauty secrets IN MARATHONS AND BEAUTY WEEKS OF THE NEW PROJECT “IQ-Beauty School” IN THE Lady IQ CLUB!!!
Author of the project “IQ-Beauty School”,
certified beauty specialist,
hairdresser-makeup artist
Guzel Samigullina
Why are measurements needed?
Single measurements obtained are of no value when losing weight; They can only be used to determine clothing size. Only systematic measurements will be beneficial because they allow you to see progress. Often numbers become an additional source of motivation, since they help not only to record weight loss, but also show its speed and changes in body quality.
The readings will also help determine whether the nutrition and training system is suitable. If necessary, adjustments can be made in a timely manner.
To get more accurate results, you need to measure several parameters at once:
- body weight;
- chest girth;
- waist circumference;
- hip circumference.
- neck;
- wrists;
- forearms and other parts of the body.
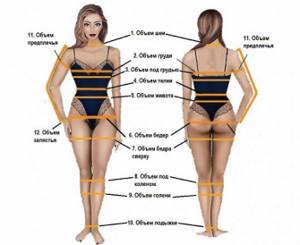
This way it will be possible to determine changes in the quality of the body. This is especially important when the weight remains almost unchanged, while there is less fat and more muscle: it will not be possible to track using only scales.
Regular measurements help track the need to change your training schedule, reduce or increase calories. Changes in metabolic rate can be determined.
size table
There are several size tables - this is an expanded and universal one.
Universal
Clothing size | (bust) circumference | Waist circumference | (buttocks) circumference |
| 40 | 79-81 | 61-63 | 87-89 |
| 42 | 83-85 | 65-67 | 91-93 |
| 44 | 87-89 | 69-71 | 95-97 |
| 46 | 91-93 | 73-75 | 99-101 |
| 48 | 95-97 | 77-79 | 103-105 |
| 50 | 99-101 | 81-83 | 107-109 |
| 52 | 103-105 | 85-87 | 111-113 |
| 54 | 107-109 | 89-91 | 115-117 |
| 56 | 111-113 | 93-95 | 119-122 |
| 58 | 115-117 | 97-99 | 123-125 |
| 60 | 119-121 | 100-102 | 126-129 |
Expanded
| GOST | Size | Height | OG | FROM | ABOUT |
| 167-88-96 | 44 | 167 | 88 | 70 | 96 |
| 167-92-100 | 46 | 167 | 92 | 74 | 100 |
| 167-92-104 | 48 | 167 | 96 | 78 | 104 |
| 167-100-108 | 50 | 167 | 100 | 82 | 108 |
| 167-104-112 | 52 | 167 | 104 | 86 | 112 |
| 167-108-116 | 54 | 167 | 108 | 90 | 116 |
| 167-112-120 | 56 | 167 | 112 | 94 | 120 |
| 167-116-124 | 58 | 167 | 116 | 98 | 124 |
| 167-120-128 | 60 | 167 | 120 | 100 | 128 |
Types of measurements
Those losing weight need to take various measurements to obtain accurate data. A larger number of measurements will allow you to notice even small progress.
Weighing
Weight is not the only indicator. In the initial stages, however, it helps well to understand whether the training and nutrition program is effective. In addition, the indicator allows you to understand whether you need to reduce calories or increase them. Body quality, however, can change while maintaining the same mass: there is less fat, and more heavier muscles. A person may look slimmer at higher weights if muscles account for more of the mass. To find out why the weight has decreased, you can use a caliper.
Measurements should be taken at regular intervals without shoes or clothing. It is important to weigh yourself at the same time, on an empty stomach. You should go to the toilet before taking measurements. You can use bathroom scales. You need to stand in the middle of the device, slightly spreading your feet to the sides. If you stand on the edge, the indicators may be distorted.
Body measurements
This method is more accurate. You can notice how the body becomes more slender. It is recommended to combine it with weighings.
There are 2 ways to take measurements.
- The first one uses a special measuring tape. The readings can be viewed during the process.
- The second method is not so convenient. Thread is used. Having completed the measurement, you need to record the data obtained, and then take readings using a ruler. An error may occur.
It is important to note in what state the measurement was taken: tense or relaxed. After training, you should not measure: the blood flow to the muscles increases, which is why they become larger in girth. It is best to measure on an empty stomach in the morning. You should not repeat it more than once a week when increasing muscle mass: muscles will not grow during this time. Those who are losing weight can be measured more often, since volumes can decrease faster.
Measuring subcutaneous fat
It is most convenient to make such measurements using special scales that calculate the ratio of fat and muscle tissue in the human body. Accurate results will also be obtained when using caliperometry. The point of this technique is to use a special device, a caliper, to measure the size of the skin fold. The device also gives readings about the percentage of subcutaneous fat. Easy to use on your own at home.
There are other methods, but they are more complicated and a large error is possible.
Photo recording
The technique involves using photographs to determine progress. You need to take photos at the same time (preferably in the morning, before eating). It is advisable to take photos in underwear or identical sportswear that fits your figure: this way progress will be better visible. It is better to take photographs from several angles: front, side, back. It is important, however, that a distance be maintained between the person losing weight and the camera each time. In addition, differences are possible with relaxed and tense muscles.
Determine the height of a particular mark
Determine the distance from the floor to the teenager's head using a ruler
You can also measure a teenager's height using a ruler. True, the work ahead is more painstaking. And the result will be less accurate. Therefore, you have to spend less time measuring.
You need to proceed as follows. First, you need to place a ruler on your teen's head. So that it is located downward. After this, you need to make a mark level with the bottom of the ruler. Move the product down. And do the same thing again. You need to do this for as long as possible. Until the teenager fully measures his own height.
A teenager can start measuring indicators from absolutely any direction. It can go both top-down and bottom-up. There won't be much difference. The main thing is to act carefully and not get confused. Otherwise, the correct result will not be obtained.
If you don’t have a ruler at home, you can buy one at any store
Luckily, even if you don't have a ruler, this isn't a problem at all. For the reason that there are a lot of shops with office supplies on the streets. And you can purchase the line in a very short time.
If you cannot purchase a ruler, then use an alternative
There are situations when finding a ruler in a short time is absolutely impossible. In this case, you can use an alternative option. Take any object whose length you know for sure. And measure the height of a teenager using it. Making the same marks next to his body as using a ruler.
Let's say you know that your toothbrush is 20 centimeters long. In this case, you can start applying it to the teenager's body while he is standing against the wall. Make marks at the bottom of the product. Then gradually move the toothbrush down.
If it is not possible to use a traditional ruler, then you can use special programs on your smartphone. There are specialized electronic rulers on the Internet. And Apple products have similar applications built into the system. If you can find a good program, it will show a very accurate result. And you can find out the approximate height of the teenager.
You can determine your height using banknotes
You can use absolutely any type of banknote for measurement. The most important thing is to find information about their dimensions. It is known that Russian rubles, the banknotes of which are fifty, one hundred, two hundred, five hundred, have the same dimensions. Their length is fifteen centimeters. And the height is six and a half. Knowing these dimensions, you can easily find out the height of a teenager.
Dimensions must be measured as follows. You need to place the banknote next to the teenager on the wall. So that its long part is placed from top to bottom. And move it until the bottom of the banknote touches the floor.
When measuring growth with money, you need to act in the same way as when using other products. First you need to measure the first fifteen centimeters. Then place a mark at the bottom of the banknote. Then move the banknote down. And continue in this way until the teenager’s height is finally measured.
If a teenager has very little room to measure, then the long side of the banknote may not suit him. In this case, he is recommended to turn the bill with the wide side. So he will be able to measure height with a length of 6.5 centimeters.
A teenager can even use their shoe size to measure their height.
If you remember what your teen's current shoe size is, you can use this information effectively. Your task is to search the Internet for a table with shoe dimensions. Then find out how many centimeters the length of each type of sneaker is. Then you will need to place your foot on a special piece of paper. Then outline the boundaries of the toe, as well as the heel. You can then measure the specified frames using a ruler. This will give you a certain number of centimeters. After which you can place the shoe against the wall near which the teenager is standing. To find out his height. The principle of measurement, in this case, will remain the same as in other methods.
How to measure volumes correctly?
It is important to take measurements correctly to get more accurate results. Before losing weight, you should measure your parameters for the first time and enter the results into the body measurements table: this way you can track your progress from the beginning. Then it is important to maintain regularity. You can choose any period from 1 week to 2 months. While a person is losing weight, you can measure more often: fat and excess fluid will disappear, and the volumes will become smaller. If the goal is to gain muscle mass, it is better to measure less frequently, since the effect will be little noticeable over short periods of time.
