The effect of planks for weight loss
The rack is one of the components of the bodybuilder training system, athlete training and fitness programs.
Thanks to it, you can strengthen the muscle corset of the back, abs, buttocks, legs and arms. The following effects are noted from regular exercises:
- Beautiful posture.
- Legs and arms become slimmer.
- The risk of developing osteoporosis is reduced.
- Tightened ligaments and tendons.
- Waist size and the appearance of cellulite are reduced.
- The health status of cervical and lumbar osteochondrosis improves.
Such good results are achieved by a certain amount of muscle tension when balancing the torso and overcoming the force of gravity to keep it in a horizontal position.
Exercise schedule for beginners
The stand is a static endurance exercise, so good physical fitness is required to stand for 2-3 minutes.
For beginners, the classic version of the plank for a month is ideal, performed on the hands and elbows with a gradual increase in the time of the stand.
| Day, no. | Time |
| 1 | 20 sec |
| 2 | 20 sec |
| 3 | 30 sec |
| 4 | 30 sec |
| 5 | 40 sec |
| 6 | 40 sec |
| 7 | Rest |
| 8 | 50 sec |
| 9 | 50 sec |
| 10 | 1 min |
| 11 | 1 min |
| 12 | 1.5 min |
| 13 | 1.5 min |
| 14 | Rest |
| 15 | 2 minutes |
| 16 | 2 minutes |
| 17 | 2.5 min |
| 18 | 2.5 min |
| 19 | 3 min |
| 20 | 3 min |
| 21 | Rest |
| 22 | 3.5 min |
| 23 | 3.5 min |
| 24 | 4 min |
| 25 | 4 min |
| 26 | 4.5 min |
| 27 | 4.5 min |
| 28 | Rest |
| 39 | 5 minutes |
| 30 | 5 minutes |
For the more experienced, it is suggested to diversify the exercises over 30 days. A total of 15 lessons are presented, after the end of the last one a repeat round is done.
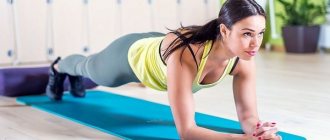
- Day 1. Starting position: the body stands up, elbows under the stoves, feet touching tightly, abdominal and buttock muscles tense. The plank is done three times for 45 seconds
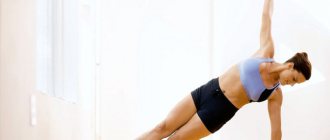
- Day 2. Starting position: from the low plank, the weight is transferred to the right elbow, the body turns. The left hand rises up, followed by the gaze. After 45 seconds, the elbows need to be changed. 3 approaches on each side.
- Day 3. Starting position: under the shoulders, the hands are straightened, the feet are pressed tightly against each other, the muscles are tense, the legs are straight. 3 sets of 45 seconds.
- Day 4. Starting position: from the previous stance you will need to turn around and transfer the weight to your right hand, and straighten your left hand forward. You need to hold the plank for 45 seconds, then change sides. The exercise is performed 6 times.
- Day 5. Starting position: low stand on your elbows. You need to alternate bending your knees for 45 seconds. 2 approaches are done.
- Day 6. Starting position: repeat position 3 days. First, one hand and then the second come off the surface and touch the opposite shoulder. The body should not sway. The stance is repeated three times for 45 seconds.
- Day 7. Starting position: the low plank smoothly turns into a high plank with straightening your arms, after which you need to lower yourself back onto your elbows. The body should be smooth. Do 3 sets of 45 seconds.
- Day 8. Starting position: lower position, bend your knees one at a time, move to a high plank. Then you need to touch the opposite shoulder with your hand and return to the lower position. You should do 3 sets of 45 seconds.
- Day 9. Starting position: low stance, elbows slightly forward. You need to slowly lower yourself so that your shoulders drop to your elbows and return back. Three sets of 45 seconds.
- Day 10. Starting position: low plank, turn the hip to the right until about 10 cm remains to the surface. The exercise is repeated in the other direction. Do 3 sets of 45 seconds.
- Day 11. Starting position: high stance, when jumping, legs are spread shoulder-width apart, buttocks are not raised and back to the starting position. Do three approaches of 1 minute each.
- Day 12. Starting position: low position with a turn on the left side. Then the hips rise for a few seconds, after which they lower almost to the floor. Movement exercises with the hips are performed up and down. Then the side changes. The stand is performed for 1 minute on each side, 2 approaches.
- Day 13. Starting position: high plank, the left knee is pulled up to the right elbow, held for a few seconds and returned back. The exercise is done on each leg for 1 minute, 3 times.
- Day 14. Starting position: low stance, right knee pulled up to the right elbow with a two-second delay and return to the starting position. Everything is repeated in turn with both legs for 1 minute, 3 approaches.
- Day 15. Starting position: high plank with arms extended in front of you as much as possible. The stomach should be tucked in and the buttocks should be tense. You need to stand for 45 seconds in 3 sets.
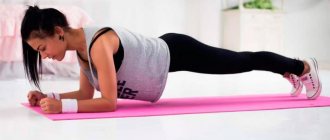
The main pose of the plank exercise set is taken from yoga and is equally suitable for men and women of any age. To practice, you only need a hard, flat surface the size of a yoga mat, and a few minutes of time. The plank pose should be taken from a position lying face down. Raise your torso and head, leaning on your arms extended or bent at the elbow joints at a right angle:
- support on the hands and feet;
- keep your back straight;
- do not bend your legs;
- look at your hands, they remain shoulder-width apart;
- the abdominal and buttock muscles are tense.
The exercise is static, the first time is performed until pleasant fatigue. The duration of subsequent classes increases.
Depending on the degree of preparedness for physical activity, the duration of the first workout for beginners ranges from 20-60 seconds. It is recommended to increase the time for performing the plank exercise for beginners by 10-20 seconds every other day. In a month, the training time will be only 5 minutes a day, and if the recommendations are followed exactly, the first results of the training will appear.
You should resume exercises after a day of rest by repeating your last achievement. There is no need to dramatically increase the time it takes to perform poses. If you feel tired and the exercise time is not over, do not bend your knees. Lowering your head or lifting your pelvis can relieve tension in your back. After taking a break, return to the starting position and continue the exercise.
Benefits and harms
All physical exercises are beneficial for the human body, although they require time, effort and desire.
The plank does not require additional sports equipment or special space. The training can be done anywhere, and at the initial stage you will have to devote no more than 30 seconds to it.
Here are the main advantages of the rack:
- Strengthening muscles. Many people complain of decreased muscle tone due to a sedentary lifestyle. The plank engages most muscle groups and with regular exercise they become stronger.
- Posture. More and more people spend a lot of time at the computer, which negatively affects the spine. Regular standing helps improve posture, well-being and normalize blood flow to the brain.
- Hands. The area of the arms with sagging skin is considered one of the most difficult because it is difficult to correct. The plank will allow you to pump up your upper limbs, getting rid of fat deposits in this area.
- Legs and buttocks. All representatives of the fair half of humanity dream of a beautiful and toned butt. Only some are lucky with good genetics, the rest have to work hard. In a set of exercises, the plank will help you achieve the shape of Brazilian beauties.
- Losing weight. The stand will not be able to remove several tens of kilograms of excess weight, but after 2 weeks you can reduce fat deposits in problem areas and improve your figure.
- Strength of will. Doing the plank daily increases a person’s willpower, which has a positive effect on everyday life.
In addition to its benefits, the stand can cause harm to the body if contraindications to training are ignored. Therefore, before starting classes, it is recommended to consult a doctor to exclude side effects in the future.
Contraindications for exercise
Despite the health-improving and general strengthening effects of the plank, there are a number of restrictions for its implementation. Before you start training, you should consult your doctor and carefully read the contraindications:
- heart disease (strong static voltage is prohibited);
- pinched nerves;
- intervertebral hernia;
- abdominal hernia;
- hypertension (low or high blood pressure);
- pregnancy;
- glaucoma;
- varicose veins;
- exacerbation of chronic diseases.
When playing sports, be attentive to yourself and be as careful as possible. Every purposeful person can become a superman for himself “yesterday” if he is not lazy, but works on himself selflessly. There will definitely be a result. “The one who walks will master the road!”
Originally posted 2018-01-09 09:17:28.
Some general tips
- You can lean on straight arms or bent elbows. You should start with the most comfortable position. Before exercising, you should stretch your wrists.
- Hands are placed shoulder-width apart and below them. If you push them forward, wider than your shoulders or backwards, the back muscles are overloaded and you can damage your shoulder joints.
- The back remains flat, not arched, not bent. It is useful to place a mirror nearby. You cannot swing up and down (right and left) during the exercise.
- Straighten your shoulders and move them away from your head.
- Do not hold your breath, inhale smoothly and for a long time through your nose, and exhale for a long time through your mouth.
It is important to correctly master a simple technique and practice regularly.
There are contraindications to exercise: painful condition, pregnancy, PMS period, chronic vascular and musculoskeletal diseases, unstable blood pressure. Significant excess of body weight greatly increases the risk of injury when performing poses. In such cases, consultation with a doctor is required.
Plank as a basic exercise
We figured out the benefits of the plank. Time to talk about how to do the plank correctly for men striving for better results. Let's look at the technique using the classic plank as an example.
The essence of the exercise is as follows:
- Take a lying position. Place your hands shoulder-width apart.
- Rest on your outstretched arms or elbows (clasping your hands).
- Straighten your legs and rest on your toes.
- Lift your pelvis and align your body so that it looks like a perfectly straight line.
- Fix your body in this position and record the time from the beginning of the approach.
The classic plank is the main exercise that has a general strengthening effect.
If you decide to use the plank as the basis of your training, pay attention to the types of dynamic and static planks designed to work with different muscle groups. The right combination of different types of exercises will allow you to achieve incredible results and give your body the desired relief, even if you don’t have time to visit the gym.
What does the bar give?
With regular exercise, metabolic processes in the body improve, the rectus, oblique and transverse muscles develop, the buttocks are rounded and pumped up. Exercise reduces the risk of spinal and back injuries. The plank will allow you to maintain your balance longer and is the best way to combat stress and bad mood.
Many women are interested in the question of whether it is possible to lose extra pounds with a simple exercise. The plank has the ability to engage almost all the muscles of the human body, thus tightening and toning the skin.
To perform it, there is no need to purchase special equipment, and it is easy to find a place for training.
Such physical activity will help you lose weight if you follow a diet, the correct technique and additional cardio exercises.
The rack is an ideal abdominal exercise that targets the rectus abdominis, transverse abs, and internal and anterior obliques. With proper and regular training, the muscles are toned and the volume of deposits on the abdomen is reduced.
To achieve a positive effect from training, you should pay attention to the basic techniques for performing a stance:
- Spine. From head to heel, the body should be straightened in a continuous straight line.
- Hands. The limbs serve only as a support and are not tensed, otherwise there is a risk of excessive stress on the shoulder joints.
- Abdomen. The abdominal muscles are tensed as much as possible, the lower back does not bend and should be flat.
How much to do?
To begin with, it is enough to stand in the plank once, but if your physical fitness allows, the number of approaches per day can be increased to 2-3 times. The main thing is that excessive stress does not affect your health.
How often should I do it?
Many people are interested in how many times a static exercise is done. This depends on the physical fitness of the person, because some will be able to stand in the plank for 3 minutes, while others can withstand 30 seconds.
The frequency of performing the stance depends on the goal you want to achieve. To strengthen and tighten muscles, 2-3 minutes daily is enough.
To get rid of excess weight, the training time is doubled. It helps prepare your torso for more challenging weight loss exercises.
Description of the exercise
The plank is a static isometric exercise that works several muscle groups at once, increases endurance, improves the balance of all parts of the body, improves the functioning of the cardiovascular system, speeds up metabolism and even has a positive effect on the psycho-emotional state. In other words, this is a universal exercise for strengthening and healing the body.
The main secret to the effectiveness of the plank lies in the properties of isometric exercises. Isometric exercises are static exercises where muscles contract for a few seconds without performing movements. With such exercises, energy is not spent on providing movement, but is completely spent on muscle tension, which leads to their significant development in a very short time. In addition, the relatively short muscle contractions during isometric exercises allow the muscles to rest much faster, which means you can train more often.
When performing the exercise, the core muscles are mainly involved. This is a group of muscles that stabilize the core and include:
- transverse abdominis muscle;
- oblique abdominal muscles;
- straight abdomen;
- gluteus medius and minimus;
- adductors;
- muscles of the back of the thigh.
But in addition to this group, the neck, arms, shoulders, chest, back, legs are also involved. We can say that the load is distributed throughout the body, but to varying degrees. Which groups are more loaded and which are less depends on the applied load and the type of bar.
Varieties
The plank has several variations, but the simplest is considered to be the straight arm stand. For experienced athletes, there are more complex exercises.
On straight arms
- In the stance, the palms are strictly under the shoulders, and the body is straightened in a straight line.
- The back should be as straight as possible.
- The abs are tense.
- And don’t stick out your buttocks.
- The chest is placed between the shoulders without arching.
- The emphasis is on the fingers, the gaze is directed to the floor, the knees are straight.
- This is a slightly different variation of the side plank, but the lower arm is straightened.
- There should be no deflections, the body is kept level to evenly distribute the load.
Side plank
- The body is in one line on its side, the abdominal muscles are tense, the upper arm is placed on the belt or extended, and the lower arm is bent at the elbow.
- The legs should be one on top of the other or one should be pushed forward a little.
- Exercise strengthens the internal muscles of the abdomen, thighs and buttocks.
From the elbow
- The body position is the same as in the classic version, but the hands are placed on the forearms, and not on the palms.
- The elbows are located under the shoulders, the body is straight, the stomach does not sag.
- While sitting on the floor, you need to straighten your legs and put your palms back, resting them on the surface behind your back.
- The pelvis rises, focusing on straight arms and heels.
- The body should form a straight line above the floor.
- The training is performed dynamically.
Types of planks
When the body gets used to the load, you can make the exercises more difficult. There are various types of techniques that allow you to increase tension in certain muscle groups. For example, you can connect weights or a fitball to your work. If you are working out with a friend, ask him to put a weight on your back.
In addition to the classics, the following varieties are very popular:
- lateral;
- reverse.
Let's take a closer look at the listed types of racks.
Side plank
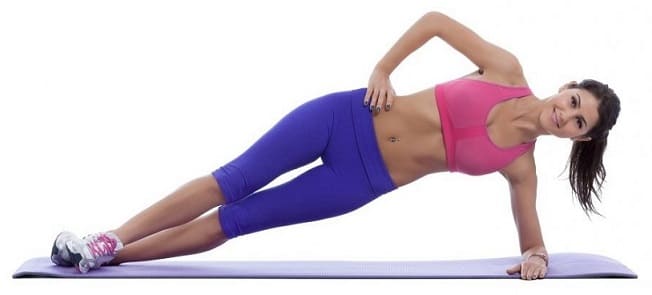
The lateral technique places increased stress on the shoulders and abdominals. It is performed as follows:
- first you need to lie on your right or left side;
- after this you need to rest your elbow on the floor surface;
- Next you need to bring your legs together and raise your hips. The feet should be directed forward;
- then exhale smoothly and lift your body so that one straight line is formed. Tighten your buttocks and make every effort to maintain your balance.
You can perform the side plank either with your arm extended or with your arm bent at the elbow. The second arm must be straightened and raised so that it forms one line with the opposite arm. You can hold it as long as you have the strength. It is very important to do every step correctly.
Reverse technique
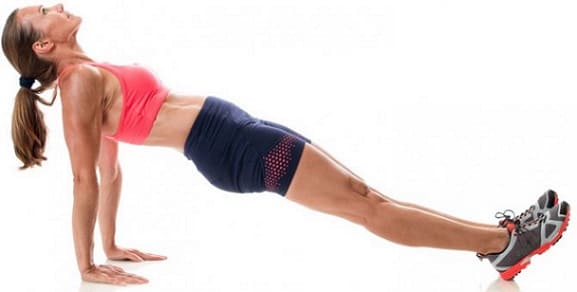
To perform a reverse rack you need:
- sit on a yoga mat or any other non-slip surface and stretch your legs straight in front of you;
- Next, you need to tilt your back back, about 45 degrees, and rest your hands on the floor;
- In this case, the hands should be located under the shoulders, and the fingers should be directed towards the legs;
- after that, tighten your stomach and buttocks and push your body forward. Align your body and brace it so that your spine forms a straight line. There should be no bending or bending of the abdomen forward.
While performing the reverse technique, make sure that your stomach and buttocks do not relax. You can start with 15-20 seconds.
Plank for men
Standing is a simple exercise that requires little time and space. But training brings many benefits.
It is indispensable for men during physical activity, performing the following functions:
- increases the body's endurance;
- helps burn fat during the drying process;
- tightens the stomach;
- forms the press;
- maintains physical fitness in combination with other exercises.
- The exercise can be considered unique, because when performing it, almost all the muscles of the body are involved.
- The stand strengthens the abs, allowing you to achieve a beautiful relief.
- Regular exercise reduces back pain, which the fair sex often complains about.
- The plank develops willpower and increases flexibility, because even hard-to-reach areas of the body are included in the process.
- Its main advantage for women is that it improves mood after physical activity.
It is useful for women to master exercises for the internal abdominal muscles in the plank pose. While performing the main pose by retracting the navel, you can force the transverse muscle inside the abdomen, which holds the intestines, to work. This is how the figure is corrected after pregnancy. When performing a pull-in, men will quickly develop the desired abs.
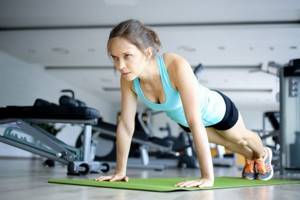
For men, the plank builds stabilizing muscles in the back, hips and pelvis, which is useful during power loads with heavy weights. Combining planks with Kegel exercises, which involve pulling in the pelvic floor muscles, is beneficial for both women and men. The internal muscles of the pelvis are strengthened, blood circulation in the genitourinary system and rectum improves.
