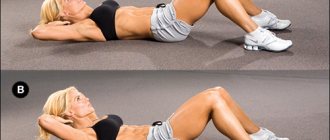
Reverse plank technique
The reverse plank is an exercise that, along with the straight and side planks, is considered an effective type of load in order to engage all muscle groups of the body. And, despite the fact that being in such a position, at first glance, may seem simple - this is only the first impression. The next day, even muscles that seemed not to be involved in the load will hurt and cause discomfort. But this moment must be experienced in order to acquire ideal body contours. The correct technique for performing the exercise will help with this.
In order to correctly stand in a reverse plank, it is advisable to:
- Take the initial position while sitting on the floor.
- At the same time, move your arms slightly back behind your back and turn your hands outward. Thus, the fingers should point towards the legs and be parallel to the body.
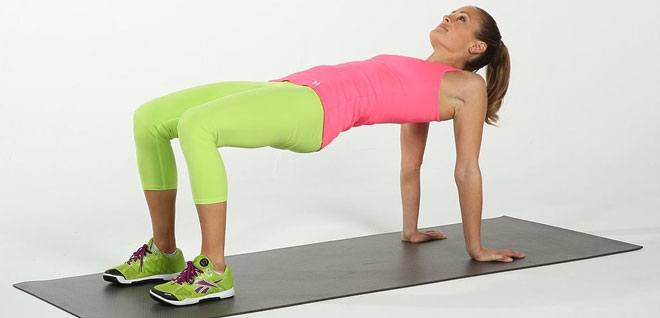
- After this, you need to press your feet tightly to the floor and, as you exhale, try to raise your buttocks so that your body straightens into one straight line. In this case, the body rises up so that the shoulders are turned at right angles to the body.
- In this case, it is important to ensure that your arms are perpendicular to the floor and your feet are pressed firmly to the floor.
- The stomach is pulled in.
- In this position, the head should look up, gaze fixed on one point.
Stay in this position for a certain time, which corresponds to the stage of muscle mass readiness. Start with a few seconds, depending on your training, and gradually increase the time you hold the reverse plank. You should not try to do this for too long right away, as this can result in muscle strain.
If the girl is pregnant and will soon become a mother, then in this case there are contraindications for performing the plank for pregnant women.
The main emphasis of the reverse plank lies on the back muscles.
In addition to this, there is another type of reverse plank. In this case, the legs are not in a straightened position, but are bent at the knees. Thus, the part of the body from the knees to the shoulders is parallel to the floor. And the arms and legs from the feet to the knees are perpendicular to the floor.
In both types of planks, the floor is touched exclusively by the legs and arms in the area of the feet and hands.
Contraindications to the reverse plank exercise

Sports activities have some restrictions.
You should train based on your own physiological parameters, health status and age factors. You should not perform the reverse plank exercise in the following situations:
- During pregnancy, regardless of the trimester, as it can provoke uterine tone due to overstrain of the abdominal muscles.
- If there is a history of a vertebral hernia or a recent compression fracture, destabilization of the skeletal system due to muscle tension can provoke a deterioration of the condition.
- After operations on the abdominal organs and cesarean section, since the muscles are intensely stretched during a fixed position, the sutures may come apart. After surgery, before intensive sports activities, you need to wait from 6 months to 1 year, depending on the individual characteristics of recovery.
- You should not choose this exercise after injuries to the elbows and shoulder joints of various types.
Injuries to the hands and wrists when performing the reverse plank are relative contraindications.
A slight modification of the exercise - resting on your elbows - allows you to effectively load the muscles of the whole body. When choosing a method for performing a reverse plank, you need to take into account your own health.
What muscles work?
The effectiveness of the exercise is due to the maximum possible involvement of all muscle groups, but the dynamic plank is much more effective. Here are the muscles that work during such physical activity:
- muscles of the arms and shoulder girdle - fascia, teres, deltoid, triceps, brachialis;
- leg muscles - gastrocnemius, biceps, gluteus and sartorius with straightened legs;
- core muscles - transverse, internal and external obliques, as well as rectus abdominis;
- back muscles - latissimus, trapezius, splenius.
It is important to remember that it is the correct execution that engages and makes the previously listed muscle structures work.
Other exercise options
There are many different variations of this exercise. I will introduce you to just a few of them.
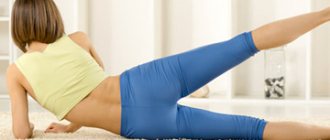
Plank with raised leg
From the elbow plank or straight arm plank, you can do two more variations of the exercise, which are more challenging.
If you lift one leg up, you will spontaneously increase the load on your core muscles. After all, the number of support points you have will change, which means the body will have to make additional efforts to keep the body in balance. This exercise increases the load on the abdomen.
When performing the exercise, the stomach is pulled in, the back is straight. Hold this position for as long as you can, and after a short rest, repeat with the other leg.
Raised arm plank
Standing on one arm is even more difficult than standing on one leg; all muscles take on additional stress in order to maintain balance and so that the body does not fall on its side.
This exercise is also performed using a plank on the elbows and a plank on outstretched arms.
One arm is extended forward, it is important to maintain the position of the body without changing

Hold the position as long as you can, then take a break and repeat with the other hand.
The arm-raised, leg-raised plank is only performed once you can perform basic planks with ease. These exercises are even more effective and efficient because they are more complicated options.
Number of approaches to achieve the greatest efficiency
For those who have just begun to engage in fitness and sports, it would not hurt to know that the load should be given gradually. Therefore, start raising your pelvis and keeping your torso in a straight position, for example, from 10 seconds.
At the same time, it is advisable to perform the exercise regularly - at least 3 times a week. Moreover, each time increase the holding time by several seconds. Everyone will orient themselves in this case on their own, as they will understand how much they can withstand this situation. Sometimes, if it is difficult to do this load, then you can keep the same time for several days and then increase the duration. This is especially true for those who have not loaded their body with physical activity for a long time, for example, women after childbirth are better off completing the bar by starting light exercise. During 1 workout you can perform 2 approaches.
It is important to consider your own condition. If your arms and legs are trembling, you should stop moving and give your body a rest. If it’s hard to stay in the plank, you can help yourself by interrupting your breathing.
Between the two approaches, you can relax the body muscles by shaking your limbs and light rotational movements. You can walk by raising your knees up.
How to do it right
Photos and videos of techniques for performing a side plank with an outstretched arm or with emphasis on the forearm can be easily found on the Internet. I like to first tense the abdominal muscles and buttocks, so that later I can repeat the same thing in a horizontal position. And then for some, sometimes something is pinched somewhere, and they cannot tense their muscles at the right moment. This should be static voltage for about 30 seconds.
I advise you to do the exercise in sneakers so as not to slip on the floor or mat. This is more convenient and you will avoid injury. I also recommend performing the exercise in front of a mirror at first to control your technique.
The right side plank involves the following manipulations:
- Lie sideways on the mat.
- Lean on your right arm bent at the elbow, and place your left leg on your right. This will be the starting position.
- Next, lift your pelvis and position your body so that it is in one straight line. You will feel tension in your arm, but make sure that the muscles on the entire right side of your body are tense.
- You need to stay in this position for as long as possible. When I started, it was 15 seconds. For a beginner this will be enough. Increase your time in the side plank position gradually.
After standing on your right hand, immediately switch to your left and repeat the same thing. Perform 3-5 approaches on each side.
Please note that the elbow should be strictly under the shoulder joint, and the body should be taut like a string throughout the entire approach, the neck should be a direct continuation of the spine, looking forward. If you deviate from the technique after a few seconds, the exercise must be completed. This seems to be a clear explanation of how to do a side plank correctly
I think you will succeed
This seems to be a clear explanation of how to do a side plank correctly. I think you will succeed.
Benefits of the reverse plank
If we talk about the general positive effects of this type of load, then first of all it is worth highlighting:
- improving blood circulation in the body;
- due to increased blood flow, organs and tissues receive an increased amount of oxygen and nutrients;
- the psycho-emotional state is normalized;
- sleep improves;
- the body becomes flexible;
- the back muscles and abdominal muscles become toned due to an increase in their tone;
- posture improves;
- the contours of the body become embossed and clearly defined.
Improved posture
The reverse plank is the perfect exercise to straighten your back.
But it is worth considering that this should only be done with a healthy back that has not undergone degenerative changes. If a person has scoliosis, lordosis, kyphosis, osteochondrosis or another disease, it will be useful to know how to do this exercise correctly and whether it can be done at all, depending on the stage.
Therefore, at the slightest deviations in health, it is necessary to consult a doctor and a physical therapy trainer.
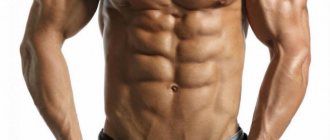
Slim stomach
The weight loss plank is an effective exercise that will help reduce excess subcutaneous fat, especially in the abdominal area. If the training is regular and carried out for a long time, then in combination with proper nutrition, the plank will form the abs, and in terms of effectiveness it will not be inferior to pumping up the abdominal muscles on the uneven bars.
Relief from back pain
Since the load allows you to intensively strengthen the muscular frame in the back area, this contributes to the proper maintenance of the spinal column. And this allows you to eliminate muscle and other types of pain associated with degenerative diseases in the back.
The reverse plank remarkably strengthens the arms without visual changes, which is especially important for girls.
Before performing a straight or reverse plank, if you have various pathologies and problems in the musculoskeletal system of the body, you should definitely consult with a neurologist, vertebral neurologist or orthopedist. Only he will be able, having established the severity of the disease, to say unambiguously in any specific case whether such an exercise can be performed.
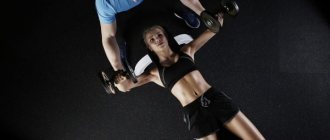
Forming a beautiful hand shape
Due to the distribution of the load with the help of the hands, a relief delineation of the biceps and triceps of the arms occurs over time. The shoulders become beautiful, muscle sagging is eliminated.
Strengthening the buttocks
Also, part of the load applies to the buttocks. Therefore, if the exercise is performed intensively and according to the rules (the buttocks should move forward as much as possible, towards the ceiling), then these muscles become more elastic, cellulite disappears and the shape becomes more rounded and regular.
Intense calorie burning
Despite the fact that the load is static, that is, amplitude movements are not performed in the exercise, calories are consumed during a plank stand (both forward and reverse) quite intensively. This happens due to the maximum number of muscles involved in maintaining the correct position.
Therefore, this load can be performed by those who want to lose excess body weight.
Increasing stress resistance
Due to the fact that all muscle groups, when in a plank stance, go into a tense state and then relax, this causes a more intense push of blood through the veins. Due to this, the circulation of cerebrospinal fluid in the body increases. And this leads to:
- increased blood flow;
- acceleration of metabolic processes;
- oxygen saturation;
- reducing swelling due to lymph outflow.
All this, especially the intensive nutrition of organs and systems with oxygen, helps strengthen the nervous system. Due to this, the body’s resistance to stress increases.
Plank for beginners
This basic bar will be the basis for all further variations. Therefore, first, master this particular type of plank. And after your strength, balance and endurance increase, you can move on to more difficult options.
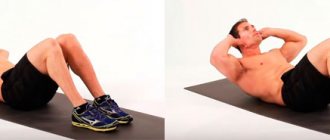
Standard bar (High)
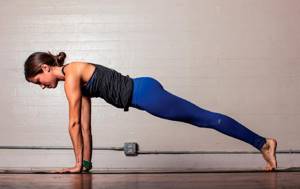
When it comes to planks, proper technique is everything. Careful execution of the technique will not only make this exercise as effective as possible, but will also prevent the possibility of injury. Get on your knees, place your palms in line with your shoulders. Rise from your knees, now resting only on your palms and toes. (As you may know, this is the bar!). Spread your fingers out for more stability. Keep your shoulders level above your palms and your heels above your toes. Your body should be in one straight line from head to toe. Tighten your abdominal muscles, make sure that your lower back does not sink, but does not stick out either.
Rolling bar
httpv://www.youtube.com/watch?v=embed/nZTYHI_NpVQ
From a standard plank position, lean forward until your shoulders are in front of your palms. Then move backward until you lower your heels as far as possible to the floor. Move slowly, watch your balance. You can lean on both straight arms and bent elbows.
Knee plank
If the standard plank is too difficult for you, try leaning on your knees. Keep your back straight and your abs tense - try to “glue” your navel to your spine (tighten your muscles, you don’t need to starve for this). Perform this type of plank until you can hold at least 30 seconds in a standard plank.
Shoulder clap plank
While in a standard plank position, try to touch your left shoulder with your right hand. Then repeat the same with your left hand. Even if you think these movements are very similar to the Macarena, do not swing your hips under any circumstances. If it makes you feel better, imagine having a full glass of water (or margarita!) on your back. This will help you focus on maintaining your balance.
Side plank
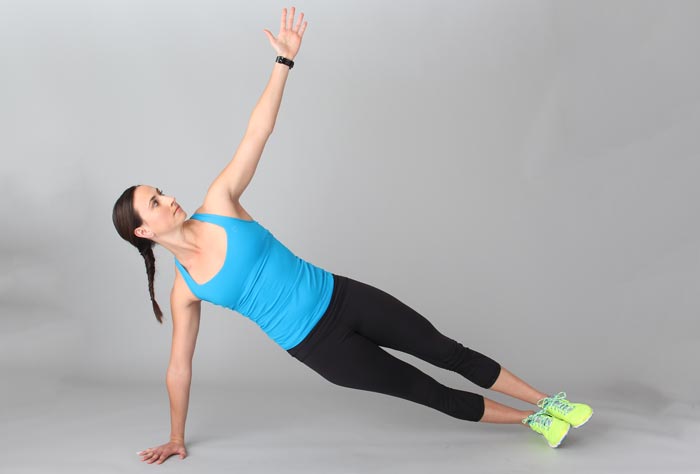
Start in a standard plank with your feet together and your heels touching each other. Shift your body weight to your left side, reach towards the ceiling with your right hand, trying to keep the weight on one hand.
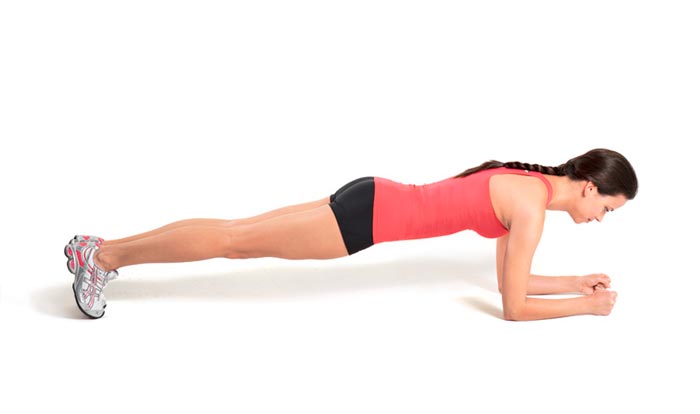
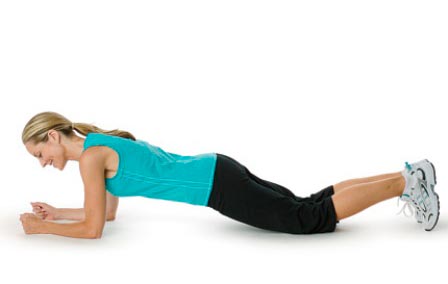
Starting position – standard plank. Lean on your forearms. Keep your arms parallel to each other, press your palms tightly to the floor or squeeze them into a lock, whichever is more convenient for you.
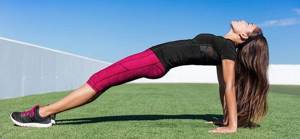
Reverse plank
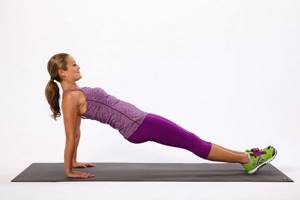
Sit on the floor, stretch your legs in front of you, keep your hands on the sides of your body. Place your palms behind you, palms pointing towards your feet. Raise your hips as high as possible to create a straight line from your chin to your feet. While doing this plank, you may suddenly find that your shoulder joints are not as flexible; just take your time. As everyone knows, trying is not torture.
Plank with TRX loops
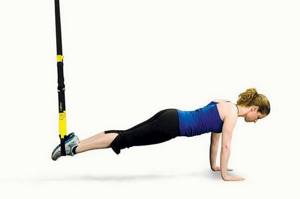
Adjust the TRX loops so that they are 30 centimeters from the floor. Kneel with your back to the TRX. Place your feet into the loops. (There's no way to do this gracefully—just try not to face the floor!) Move forward until you're in a plank position. Place your palms or forearms on the floor in front of you. Raise your knees so that your body is in a straight line.
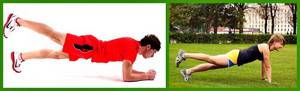
"Sneaking" bar
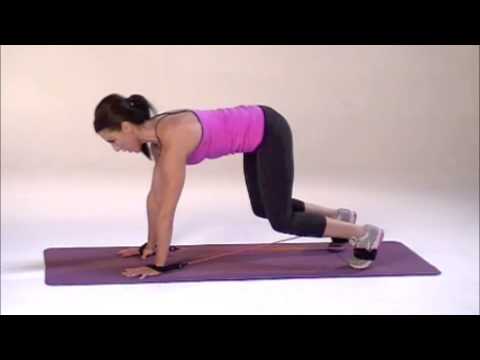
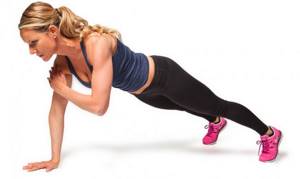
Starting position: on your knees, back and arms straight. Tighten your abdominal muscles, keep your back straight, bend your legs (at an angle of 90 degrees), lift your knees off the floor. Now you keep your balance solely through your arms and feet. Crouching Tiger, Hidden Press?
Common Mistakes
Most often, those who are just starting to do this exercise try to stay in an upright position for as long as possible. But this is absolutely impossible to do. Such diligence can lead to muscles becoming overstrained and ligaments being torn. In addition, excessive stress on the spinal column can lead to injury.
Therefore, it is necessary to do everything smoothly and consistently. Do not neglect the recommendations, no matter which method of planking is chosen, especially regarding the execution technique. And then the result will not be long in coming.